Showing posts with label Tips and Tricks. Show all posts

How to Take Portraits that Stand Out


In the US consumers have access to portrait studios at every nearly mini -mart, shopping mall, and super store on the block. There’s Intouch. Flash! Picture It. Sears. Olen Mills. Lifetouch. Celebrity Kids. Picture Me – And those are just the chains. Add to that every other studio offering a twenty dollar session option, and we have thousands upon thousands of portrait studio’s all around us.
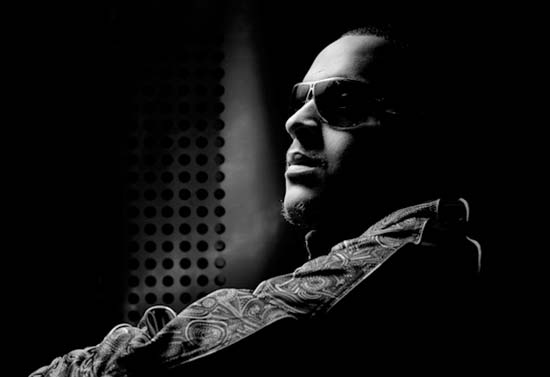
Image I.jpg
In this industry the only way to truly stand out as a portrait photographer is to show through – your portraits – that you have a different perspective of people than anyone else. In Portraiture capturing that perspective means knowing yourself, your style, and your loves and incorporating them into your sessions.
This may be easier said than done, but with a bit of ingenuity and enthusiasm, you might be surprised by how uniquely you can build your portrait sessions. Take the following ideas as a starting point – and add your own personality, perspective, and creativity to your portrait sessions.
Image II.jpg

Plan a Themed Shoot

Portrait Shoots with a theme are popping up in E-Sessions everywhere! These sessions can be incredibly fun and create a dynamic result! The key in developing these shoots is taking the time to ask questions and base the session off a theme that your client is excited about.
  • Have a session “planning meeting”. While this is an extra step, it’s also an opportunity to connect on a personal level.
  • Ask questions about their “favorite things”, or era’s in history that they had a love for. You may draw inspiration from the “Shabby Chic” way that their home is decorated, or the fact that they love going to Broadway plays. Whatever the case, be sure that the theme will be a reflection of your client.
  • Do your research. What kind of props will fit well with your theme? Help your client out by giving suggestions of where they might be able to find these props.
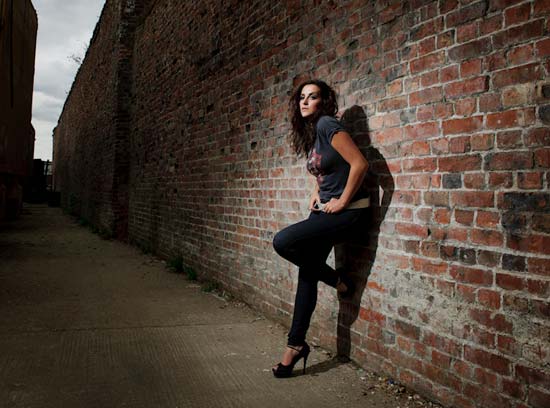
Image III.jpg

Setup a LifeStyle Shoot

No other kind of portrait shoot can facilitate capturing your subjects personality and style more than the environments they are most comfortable within. In a LifeStyle shoot, you have the flexibility to plan the session in the families kitchen as they make cookies together, or outside their favorite ice-cream stand as they lick cones. These shoots aren’t as “set up” as typical photoshoots, challenging you to capture their authentic life as it happens.
  • Never put the camera down between shots because sometimes the magic happens when your subjects forget they are being photographed.
  • Watch their expressions and environment: A lifestyle shoot is about the whole – drawing each piece together to bring a unified shoot. Capture this.
  • Know the environment you are photographing in: If you are shooting at their home, be sure to do a quick run through before to evaluate the available light. Do this ahead of time to anticipate that indoors, you may want additional lighting options.
Image IV.jpg

Network with a Glamour Shoot

Utilizing additional resources for a Glamour shoot may be just what a client needs to boost their self confidence. Sometimes people don’t know how beautiful they are without a little bit of help. Glamour sessions insure a “high fashion” or “beauty” aim for each and every shot. The poses, the hair, the makeup, and the location all contribute to this end.
  • Ask your client if he or she has a personal stylist who would be willing and available to work with you.
  • Ask around your own networks to find a few capable stylists in your area. Contact these individuals and suggest a partnership opportunity to pass along business and collaborate on photo shoots.
  • Be sure to make the partnership a “win-win”. Perhaps the client pays for the stylist, but offer the stylist a few 8×10 prints from each shoot for his or her portfolio.
Don’t know what kind of photo shoot you’d rock? Experiment with friends before launching these shoots for pay. You may find that you enjoy the variety of each kind of shoot. Just remember that it is important to specialize, developing a particular style distinctive to your own work.
Go for it. You just may give those portrait studios a run for their money.
Post from: Digital Photography School - Photography Tips. Check out our resources on Portrait Photography TipsTravel Photography Tips and Understanding Digital Cameras.

5 Tips for Creating a Story in Your Image


Article and photos by Oded wagenstein.


In an era when we are drowning in images and lots of people and talents are competing for the viewers’ eyes or the magazines’ attention, have you ever wondered what makes you have a longer look at an image?
Is it the person that was photographed? Perhaps a certain color or an angle?
What is the secret of the photographers that mange to get their work published on magazines and newspapers? What is the secret of taking a strong image that lasts?
1.jpg
The secret of all strong images is their ability to provide the viewer a story .
Since the dawn of time, People gathered around the fire and shared stories with each other.
It doesn’t matter what subjects you like to shoot. If you want to become a good photographer, you have to be a good storyteller first. An image with a story, one that evokes emotion and curiosity will rise above other images and catch the viewer’s attention.
So what is the stuff of which “visual stories” are made from?
In most cases it is an emotion that the image creates. It can be empathy, curiosity or even negative emotions such is anger.
Even if you are dealing with macro or landscape photography it is better to have an image that tells a story. However, the best way for me to get a story is with people photography, as people are a large “pool” of stories and emotions.
Here are 5 tips for finding your “visual story” in Travel photography before departure, and on the road:

1. Preparation needed

The thing that makes the difference between an amateur and a professional in almost every field is usually preparation.
A professional photographer will start working even before leaving home, while an amateur photographer will wait for things to happen in front of their eyes in the field. Professionals will gather information that will help them exceed the potential of getting those photogenic stories on the road in minimum time and by doing so, increase the amount of good strong images.
2.jpg
What are the things that are worth checking before going to shot on a trip for example? Here are some classic examples:
Will there be any festival or photogenic event during your stay? Festivals are a great place for finding stories. Is there any taboo related to photography or culture in general in the country you are going to visit, that you must know? For example, the hill tribes that can be found on the mountains of Asia (as the woman from the Karen tribe in photo number 2) mostly believe that taking their photo would also take their soul. And trust me, the custom officers in your home country would not like the “soul” attached to your camera.
The best thing you can do to get this kind of information is to get the advice of a photographer who has already been there. Online photography forums would love to help you with that.
Want to take your photography to the next step? – Take a journey deeper into the place and read a little bit about the culture and history, prior to arrival.
The best tip someone has given me is to learn a few words of the local language. Locals appreciate people who try to speak their language (even if they laugh at them a bit at first)
Learning “Hello”, “Thank you” and ” may I take your photo?” will do wonders to your story telling images.

2. Getting closer

3.jpg
Taking photos of people from a distance with telephoto lens may be safer and will not ruin the spontaneity of the story, but there’s nothing like the narrative and emotional quality of close-ups in people photography.
Sometimes I want to photograph people from just a few inches away and still keep the spontaneity and intimacy.
What do I do? – I look for this moment in which the person returns to routine activity, after creating a bit of a connection with them and letting them understand that my camera and I don’t have any bad intentions.
I never approach people while the camera is hanging from my neck. It is threatening and may result in negative responses from the locals.
After greeting the person (in their language) I sit with them for a while, let them get used to my camera and me and only later I begin taking photos
Never ever forget- people don’t like to feel they are on a show for you. Always treat them with respect. The best way to do so is with the help of a local. So go to the next Section

3. Best ice breaker

4.jpg
Professional photographers use a fixer, which is a local who knows their needs as photographers and helps them to get around.
You can use a fixer, but you can also find your “fixer” in a much more interesting way and for free, in most cases. You can connect with local at your age in advance to your visit on the basis of “culture exchange”. The local will help you get to the best places and will also recommend which places to avoid. They will speak for you in their local language and will be the best “ice breaker”. All you have to do is be polite but it won’t hurt to bring your host something for your own country, like postcards or a unique product related to your place.
If you can find a photography student to be your fixer, it can be an exciting experience for both of you.
Hanging with a local as a friend or with a professional fixer does not give exemption from the previous section of “getting closer”.

4. The Stories generators

5.jpg
Feeling lost? Feeling unpleased with the photos you took? You can always try to visit a “story generator”. It can be anywhere that people Gather: a market, a central square or a festival. Just be alert and keep your eyes open and the stories will simply appear before your eyes.
The best tip for finding a “story generator” place is just to go to the places that interest you. It could be a church, a busy street, a quiet beach or even an abstract shooting of a building. Go with your passion and you will find your stories.

5, Last one for the road – get lost

We talked about the preparations and the work needed for good story finding, but sometimes all you need is to leave the tour guidebook in the hotel room and just go outside to walk the streets and roads looking for the unexpected.
Some of my best stories and photos came to me with this way of traveling.
Don’t forget to check with the locals or your fixer about the places that should be avoided and always, but always, check the time of your last ride home.
Oded Wagenstein is a travel photographer. His photographs were published on numerous magazines and websites world wide.
He is known for his intimate culture portraits. In his works he put the emphasis on understanding the culture and achieving good relationship with the person being photographed pre-shooting.
You can join his Travel photography group on Facebook and continue to discuss on travel and people photography:


Tips on shooting cropped landscapes

Words and images by Robin Whalley - www.lenscraft.co.uk

Despite all the advances and advantages of digital photography, and the sheer number of pictures now being produced, I find most people are using the same “formula” for their work. Super wide angle lens, angled down to give a huge foreground which then zooms off to infinity. Now don’t misunderstand me, there is nothing wrong with this approach and it has produced some wonderful and amazing sweeping landscapes, but it can become a little repetitive at times. It’s also not possible to do justice to many landscapes using this approach for a variety of reasons:

  • Possibly the composition you need can’t be achieved
  • The weather might be flat and grey
  • Perhaps the landscape is just too vast

When this happens I suggest you turn to "cropping" your landscapes and I don’t mean in Photoshop (although that can sometimes work). Here are three approaches you might want to consider.

Take this landscape shot for example. This was shot from the side of Yewbarrow looking across Wasdale Head towards Scafell Pike. The area is simply spectacular from this vantage point and you would need at least a 270 degree panoramic to do justice to it and even then I’m not certain. My alternative approach is instead to use a telephoto lens to crop in on an area of the landscape. I feel this creates a more dramatic image with much more impact than a pretty (but spectacular) landscape panoramic.


Using the longer lens I have cropped in to and emphasise the most dramatic elements of the landscape. The scale of the landscape has not been diminished as it would using a wide angle lens and whilst the longer lens has compressed the perspective, including the side of the mountain on the right has allowed me to retain a feeling of depth.

Another much more common approach to cropping the landscape which often works well under flat dull lighting conditions is to concentrate on just one simple element or subject. Take this rock formation for example.


When this was shot the lighting conditions were flatter than an 18% Grey Card and including much more of the landscape was simply out of the question. Fortunately there were plenty of rock details on which to concentrate and the even lighting created by the overcast sky allowed me to create a nicely exposed image. I later boosted the contrast in Photoshop and tweaked the saturation a little to emphasise the orange rock strata.

The other technique to consider when cropping the landscape to isolate a subject is depth of field. Think about it and you realise you are cropping the depth in your image rather than the edges. Take this picture for example.


It was shot with a standard lens on a Medium format camera, with the lens wide open at f/2.8. The standard lens has allowed me to crop in on my subject but the wide aperture has thrown the background, including a very uninteresting sky, completely out of focus. When you see the full size print of this image you realise the depth of field is only about 12 inches allowing me to keep the bow of the boat and lobster pots in focus. This approach also allowed me to retain the distinctive mound of Lindisfarne castle, even though blurred, to provide a sense of place.

Next time you are shooting landscapes and find yourself faced with poor lighting or compositions that just won’t work, consider cropping.

Words and images by Robin Whalley - www.lenscraft.co.uk 

10 quick documentary photography tips

10 quick documentary photography tips - image Ben Birchall/Future


1 Tell a story
Use photography to tell a story. First you’ll need to choose a subject, which can be the hardest part of the process. Before you head off to far-reaching countries, try experimenting with story ideas closer to home. Whether it’s the drudgery of life in an office or the joy of working your own allotment, you’ll find there are plenty of interesting stories near by.

2 Do some research
Even if the story is close to your heart or home, you should still do some research. Plan what you want to say. Ask yourself if you want to tell the story in just one shot or whether the subject might beneit from a series of multiple pictures. A photo essay, for example, could help you to reveal more about your subject.

3 Choose your style
Think about the way you intend to shoot and how you want the final image to look and feel. Do you want the finished pictures to be in black and white or colour? Do you only want to use natural light to enhance the mood, or will hard flash light add to your story? A bit of planning will make your photos more coherent. Take a look at the best documentary category entries of Photographer of the Year 2010 for inspiration…

4 Be prepared
Once you’ve decided on an approach and style you’ll need to ensure you have the right gear to capture your shot. You probably won’t need to take your entire kit bag with you, so just select the tools you need. Be sure you’ve got the right focal lengths covered, and ask yourself if you might need a tripod. Are your camera batteries fully charged? Have you got spare batteries for your flashgun and plenty of memory cards? Don’t let a lack of preparation ruin a shoot.

5 Get permission
It’s a good idea to seek permission, especially if you’re photographing people going about their business. Explain what you’re doing and you’ll often get a hearty collaboration from your subject, but sneak around suspiciously and you’ll be given a wide berth or asked to leave. If you’re working on a long-term project you’ll need to build a healthy rapport to get results.

6 Don't rush
The best documentary pictures are often the result of a long-term project, so try not to rush in and attempt to capture all the shots in one go. If you do end up with limited time in one location, try to maximise the time you have. 

7 Get back-up
One of the most important tasks for a digital photographer is to ensure all your images are safe. As soon as you get back from your day’s shooting, download your images and make back-up copies on an external hard-drive or DVD. It’s a good idea to keep your back-ups in a different location to your main computer.

Process your images
Once your images are safe you can start to process them. If you shoot in RAW you can make most of your tweaks to colour, tone and contrast at the processing stage using smart software such as Adobe Camera Raw. For a documentary project it’s unlikely that you’ll want to manipulate your images heavily. Just make a few adjustments or try converting to black and white for added impact.

9 Think about presentation
Once you’ve finished your project, think about how you want to show it off. If you’ve made a series of images, perhaps you could have them printed and framed to be hung in an exhibition, or perhaps they would be better suited to being viewed in a book format. There are plenty of online printing services that can make great books of your pictures for a reasonable price.

10 Learn from the best photographers
Magnum Photos is a photo agency that was founded by Robert Capa, Henri Cartier-Bresson, George Rodger and David “Chim” Seymour just after the Second World War. It’s since become one of the world’s most important photographic institutions. Check out the ‘In Motion’ section for slideshows of the members’ work, along with fascinating commentaries.


Read more: http://www.photoradar.com/techniques/technique/10-quick-documentary-photography-tips#ixzz1F9RIGhFn

Off-Camera Flash


Getting Started with Off-Camera Flash Image

If you think flash always kills atmosphere and leads to horrid stark pictures, you’re missing out on a whole world of stunning photography that flashguns can bring.
Lifting a lifeless portrait, filling in shadows from harsh sunlight or even creating dramatic colourful scenes, getting to grips with flash can transform your photos. And it’s not as hard, or as expensive, as you may think.
If you’re serious about making the most of your camera and don’t mind carrying an extra bit of kit, then by far the best investment you can make in your photography is buy a separate external flashgun – the sort that can be mounted on your hotshoe.
There are loads available, both from your camera manufacturer who will probably offer a whole range of models at various levels of function, power and price, to independent makers. These are often specifically matched to your camera so work pretty much like the proper “dedicated” gun anyway but are often cheaper.
GettingsStarted with  Off-Camera Flash
It’s best to look for a gun that can be bounced and swivelled, and has not only fully automatic modes but can be set manually too.

A hotshoe gun typically runs on AA batteries which are cheap to replace and give fast recycle times, especially is you the latest rechargeable batteries. You can even buy external battery packs, too.
Using the flash on the hotshoe can give great results, especially if the light it bounced off a wall or ceiling. But the best thing to do is take it off the camera.
GettingsStarted with  Off-Camera Flash
When taking photos, what we’re trying to do is make a three-dimensional subject look like a 3-D subject when viewed on a flat piece of paper or computer screen. The easiest way to do this is to get the light source off the axis of the camera lens so it makes some shadows. 
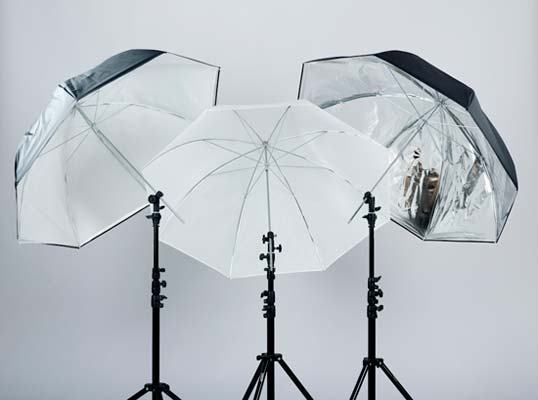
To do this, you’ll need to physically get your flash off your camera. The easiest way to do this is mount it to the top of a proper lightstand, although a tripod will work – as will getting a friend to hold the light for you. Ideally the flash should be mounted on a tilting umbrella adapter. This allows you to fit umbrellas or other light modifiers to it, and to tilt the flash to a suitable angle.
Next you have to trigger the flash. If you’re using a dedicated flashgun, you may already have the technology built in to the flash and your camera to make it sync. Many consumer cameras have a pop-up flash which can be used to wirelessly trigger an external flashgun. Not only that, if you do use the manufacturers’ own system, you can continue to use the camera in any of its modes – from manual to aperture priority or even program. And it will work out the exposure for you. A dedicated sync lead will also work, but there’s the additional problems of trailing cables.
GettingsStarted with  Off-Camera Flash
If you’re using your camera and flash in an automatic mode, then quite often the flash will just pump out too much or too little light. Your subject may be over or underexposed.

The way to stop this happening is to use your flash exposure compensation which is sometimes set on the flash itself or on the camera’s shooting menu.

If your flash is too bright and your subject overexposed, try setting one stop of underexposure or -1. Then tweak from there to get the right effect.
This should give a background and subject both correctly exposed

Top 10 Tips for Memory Card Maintenance


Top 10 Tips for Memory Card Maintenance Image
Jeff Cable, professional photographer for Lexar Media, shares his top 10 tips for looking after your memory cards.
Memory cards are a key component for every level of digital photographer, from novices all the way up to professionals.
However, memory cards only remain effective image storage devices so long as they're maintained correctly.
Taking good care of memory cards and remembering a few easy tips to maintain them well will help ensure that images are protected.
Here are my top 10 tips...
1. Format the card in your camera
Before you start taking photos, format your memory card in the camera you'll be using.
This is better than formatting it in your computer as the formatting of the card will align itself automatically with your camera, ensuring that the card works properly.
Top 10 Tips for Memory Card Maintenance
2. Acknowledge your capacity
Make sure you pay attention to the image counter as it ticks down available images. Pictures could become corrupted if you try to use a full memory card.
3. Remember you can use recovery software
If you have formatted your card in the camera or deleted an image by mistake, don't panic, your images may not be lost. Using recovery software, such as Lexar® Image Rescue® 4, gives you the ability to try to retrieve lost images.
If you accidentally format the card incorrectly in your camera, do not continue shooting with that card. Instead, remove the card from the camera and run your recovery software on it to retrieve the images. If you continue shooting with the card, the images that you capture will override the images already on the card.
Top 10 Tips for Memory Card Maintenance
4. Rotate cards in and out of use
If you're using multiple memory cards on a shoot, as many professional photographers do, develop a system for knowing which cards have been used and which cards are empty.
For instance, if using a card wallet, place the used cards in upside-down and the empty available cards right-side up. This will ensure you don't accidentally use a full card and corrupt existing images, as well as get even use out of them

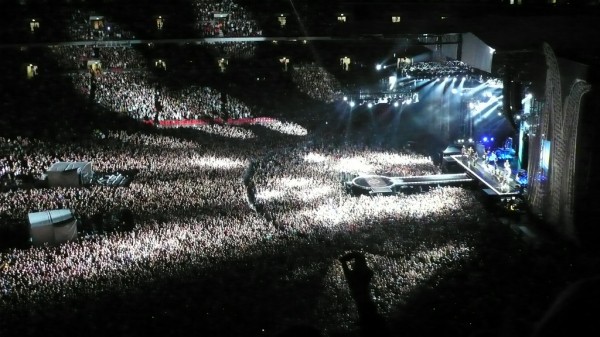
how to photograph a concert from the cheap seats with a point shoot


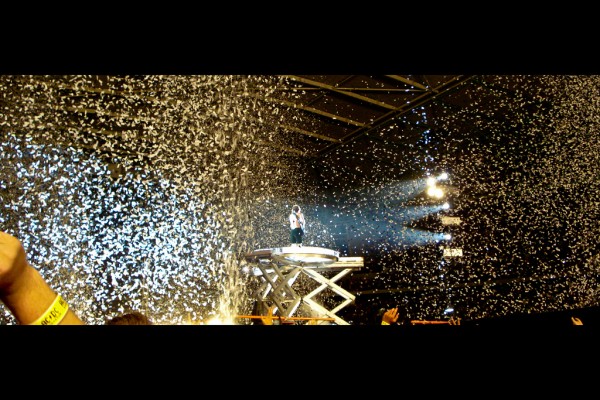
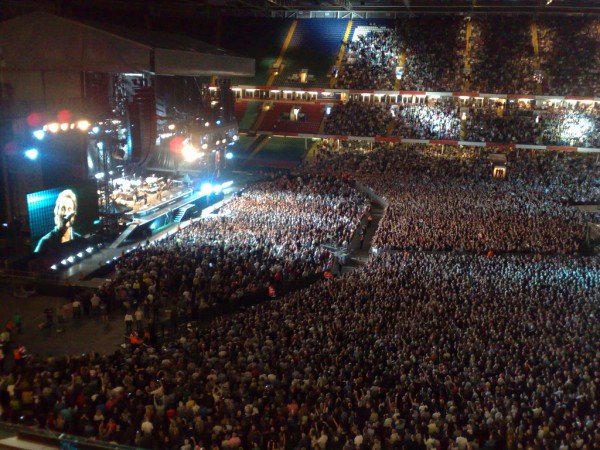
Have you ever sat in a stadium at a concert or sporting event and wanted to capture the moment?
You pull out your point and shoot camera out of your pocket and line up the shot, check it’s on Auto and – FLASH!!! – you got it…. or did you?
Image by lloydi - Panasonic DMC-LX2
You look at the back of the camera expecting a wonderful shot that just captures the atmosphere perfectly and are surprised to see a shot that has the 3 rows in front of you perfectly exposed – but complete darkness after that.
What’s wrong? Well to put it simply – you should have turned off your flash.
Don’t worry though – you’re not alone. In fact if you look around the stadium you’ll notice hundreds of other flashes going off – followed by people looking at their cameras with confusion and disappointment.
The problem is that your camera’s in built flash is simply not built to light up a stadium. In fact most in built flashes are going to struggle beyond 10 or so meters – so leaving it on is not going to help much (unless you’re lucky enough to be in the front row). To make maters worse if your flash is on – your camera is going to choose settings expecting that the flash will have an impact – so it’ll choose a short shutter speed, lower ISO and smaller aperture – further darkening your shot.
So what’s a photographer to do?
Firstly – you might want to lower your expectations a little. Large dark venues can be tricky to get great shots with point and shoot cameras. You can certainly improve your shot from those you’ll get in Auto mode with the flash on – but there is probably going to be a ceiling in terms of quality.
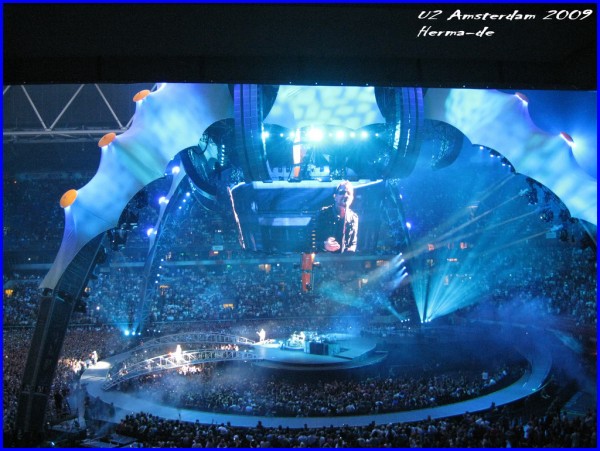
Keep in mind that most of the great close up shots you see in magazines of concerts are taken by Pros with top gear and most of all – they get access up very close to the stage (in the pit).
Image by Herma - Digital IXUS 960 IS
Having said that, there are a few things you can do to increase your chances of a shot that captures something of the event you’re at – even if you’re way up back in the last row. Here are a few things to experiment with:

1. Turn off that Flash

This should be your first step. Most point and shoot cameras have a setting where you can override the automatic flash and turn it off. This will give your camera a hint as to what to do – it’ll hopefully compensate by adjusting the settings it chooses with a combination of increased ISO, longer shutter speed and larger aperture. It won’t be perfect – but you’re moving in the right direction.
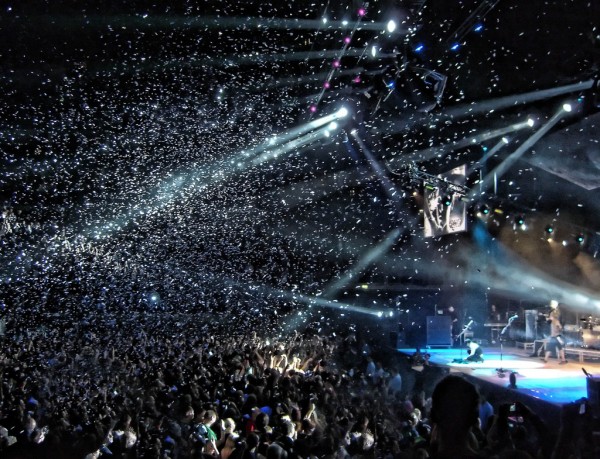
Image by stumayhew - Casio EX-Z750

2. Shoot when the lights up Bright

If you’re shooting at a concert where there is a light show you should experiment with shooting when the lights are at different levels. One of the main problems that you’ll be facing is that in most instances there simply won’t be enough light – so if there is a moment in the concert where the lights are brighter than normal – this could be a good time to shoot.
Keep in mind though that depending upon your camera’s metering that the bright moments, particularly when lights are shining out into the audience, might also lead to over exposed shots – so you might also want to experiment with shooting when they’re a little lower too. In time you’ll work out when the best timing is.
Note: this tip varies a little depending the color of the light. Many concert photographers particularly struggle with lots of red lights.
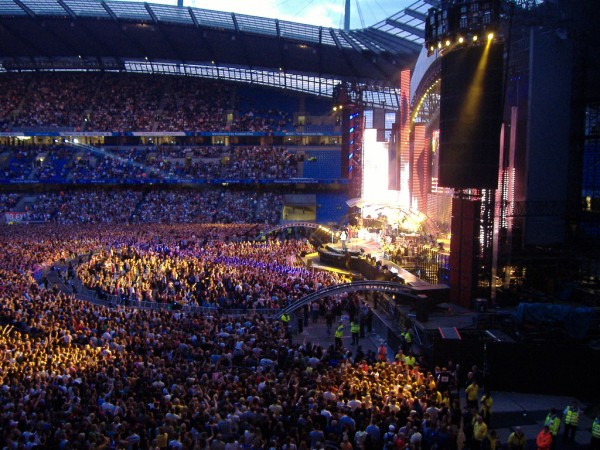
Image by SBishop - Fujifilm FinePix A350.

3. Stabilise It

One of the issues you’re going to run into in a dark environment is that you’ll likely need to shoot with a longer shutter speed than normal – this means you’re going to face the problem of camera shake. Usually we’d overcome that with a tripod – but it’s unlikely that you’ll have one of those handy – so look for other ways to keep your camera still.
This might mean finding a wall to lean up against, or a barrier in front of you to place it on…. or just avoiding the guy next to you doing 80’s break dancing moves!
Image by M??K - Sony DSC-W35

4. Play with Your Settings

OK – so it’s unlikely that you’ll want to spend the whole concert playing around in your camera’s menu to find the right setting…. but if you do want to experiment (ie: your wife’s dragged you along to a George Michael concert and you’re looking for for a way to pass the time…. hypothetically of course) – there will be a few settings that you’ll want to play around (if your point and shoot has the ability to give you some manual control). The ones you’ll mainly want to play with are the three main ones in the Exposure Triangle:
  • ISO – increase it and you’ll not need to use as slow a shutter speed. Of course the higher it goes the more ‘noise’ you’ll get in your shots
  • Shutter Speed - there is no single shutter speed that you’ll want to choose – but play around with some slower speeds if you can find a way to stabilise your camera. Of course as you slow down you’ll introduce the increased chance of camera shake but also could start to capture movement on the stage (this may be an effect that adds some interest – but you probably wouldn’t want it in every shot). If your concert is one with little movement (I’m thinking of choirs, orchestras etc) you might be able to slow things right down without too much blur.
  • Aperture - aperture is the hole inside your lens – the larger it is, the more light comes in. This is good in a low light situation – however has an impact on the way your picture looks – particularly depth of field which narrows.
Another setting that one friend always plays with in camera is White Balance. I’d tend to leave this til I get home to sort out – but it could be something for George Michael’s second set where you’re really looking for something to do…. hypothetically of course!
Image by thornj - Nokia N95

5. Zoom

You’re in the back row…. so you’ll be tempted to zoom that little lens as far as it goes to magnify what ever’s happening on the stage as much as possible. However there are some implications of doing this too.
For starters the longer your zoom the more likely you’ll get camera shake impacting your images. The zoom doesn’t just magnify the scene but any shake.
Also you’ll want to avoid letting your zoom go into ‘Digital Zoom’ range. Most point and shoot cameras have what is known as an optical zoom and a digital zoom. The optical zoom doesn’t decrease image quality (apart from the camera shake mentioned above) but a digital zoom is really just enlarging your shot which means your image becomes more pixelated. You would be better to just wait til you get home and do the same thing on your computer.
Also on this note – if you’re a long way back there might be a way to make the most of that and go for some wide shots and take in the crowd, stadium/arena and show the scale of the event

Photo ideas: 'fine art' food photography


Photo ideas: 'fine art' food photography
A light box
A light box is essential for this kind of food photography. If you don’t have one, they can be picked up second-hand through the well-known online auction sites relatively cheaply, or if you’re more adventurous, try making your own. All you need is a sheet of glass, some tracing paper and an angle-poise lamp.

A right-angle viewfinder
A right-angle viewfinder isn’t essential for this project, but it will make composing your shots a lot easier. With the camera suspended between the legs of your tripod it can be quite awkward to frame your shot. If you don’t have a right-angle viewfinder, live view is a good alternative – if your SLR has it.

A macro lens
As you’re working fairly close to the subject and you’re limited by the height of your tripod – particularly as your camera  is suspended beneath its legs – use a macro lens with a relatively short focal length. The Nikkor 60mm f/2.8 (mounted on a full-frame Nikon D700) we used here was perfect.

Fruit and vegetables
You don’t need exotic fruit and veg for this project – you can try anything you like. For a few quid you should be able to get more than enough to get started. Visualise how a specimen might look when sliced and placed on a light box. The red onion, cucumber, orange and kiwi used here worked a treat.

1. Set up your tripod
Remove the central column of your tripod and reattach it the wrong way round with the head hanging below the centre. This will enable you to take pictures of the flat surface of the light box more easily. Place the tripod over the light box and attach your camera. If you’re working on a small table top, make sure the tripod is secure by applying some gaffer tape around the feet, fixing it in place.
2. Prepare the food
Use a clean, sharp knife to slice the fruit and vegetables as thinly and evenly as possible, then place them on the light box. Any unevenness will affect the tonality of your image. If you’re using multiple slices, such as in our main red onion , arrange each slice carefully so that together they create a balanced and harmonious composition. Moving each slice just a millimetre or two can have a big impact on the final shot. Now close the curtains to darken the room and prepare your exposure.

3. Choose the exposure settings
Like most close-up work, it’s best to switch your focus from autofocus to manual to ensure pin-sharp results and avoid the frustration of the AF searching for a focus lock. The bright light of the light box will deceive your camera’s light meter. It’s a little like shooting in the snow – all that brightness will cause the camera to underexpose in an auto mode. For the best results dial in an exposure compensation of between +1 and +2 stops, or switch to manual mode. Ideally, you’ll want to use an aperture of about f/8 for enough depth of field. To avoid camera shake, lock the mirror in the up position and avoid touching your camera by using a cable release or self timer.

4. Check the histogram
Assess your exposure using your camera’s histogram. Don’t be alarmed if it looks like there’s some radical clipping on the highlights on the right of the graph. It doesn’t matter if they burn out – this will be down to the parts of the image that should be totally white. However, it is important that there’s detail in the subject, so check this carefully. If you’re in any doubt, take the time to download a test shot to your computer to review before proceeding.

Top tip: shooting tethered
For indoor photography projects such as this, attaching your camera directly to your computer and shooting tethered is a great way to maximise your workflow and get the best possible results. Programs such as Adobe’s Lightroom 3 make this easy. It’s particularly useful for this project, because looking through the viewfinder can be a little awkward.

To make a striking and innovative piece of fruit and vegetable art we created a simple grid, bringing four of our specimens together. You can download 10 free photo grids, or create your own in Photoshop. Shoot each slice individually, then in Photoshop CS and above, or Elements, use the Free Transform tool to alter the diameter of each slice. Then copy and paste them into a new document as multiple layers and form an artful grid. Once you’re happy, print, frame and put it on the kitchen wall for a striking piece of art.


Read more: http://www.photoradar.com/techniques/technique/photo-ideas-fine-art-food-photography#ixzz1E3LY3C92

How important are megapixels in your digital camera


print
Lately, everyone has been talking and boasting about how many megapixel he has got on his camera. Recently, one of my friend compared my Canon SX 110 camera (which is of 9MP) to his Sony Cybershot (which was of 12 MP) and he was ruffled to notice that my cam actually was able to take better photographs than his camera in any given condition

I wasn’t remotely surprised to see that he was also in the same bandwagon of “Look, I got more megapixels than you, I RULE” bandwagon. I don’t know from where have people made Megapixels as a de-facto benchmark of judging a digital camera’s ability to take better photographs. So in this article, I’ll try to break all the Megapixel myths prevailing out there.

What exactly are megapixels?

First and foremost thing that I would really shout out loudly is, “Megapixels are not everything”. And if you got more megapixels than me, it doesn’t mean that you are better (you might be, but that’s not the only thing to be considered). You may ask why? Let me elaborate:
Getting to the point, tell me one thing, when you decide to purchase an entry level point-and-shoot digital camera (the Sony Cybershot kinds of), what do you really want to do with it? I’m sure, most of you will say “Just take family and holiday pics and view them on my computer/mobile” and very few of you may actually print them out as well. Now, you’ll surprised to know that if you only want to do these things with any digital camera of this universe, the maximum megapixels you need is FOUR. Yes, a 4 megapixel digital camera is really sufficient for all your daily needs and you won’t even notice that it’s a 4 megapixel camera if I scratch the label out and write 12 megapixels on the lens. Trust me, you’ll never find out
alive
The reason behind that is, many people don’t really understand what megapixel is. Theoretically, Megapixel means Million Pixels. And it’s a unit to signify how many million pixels per inch can your digital camera capture. All digital cameras have tiny sensors built inside them which act exactly like the retina of out eyes. The light photons fell upon them and the photons gets trapped on the sensor and the image is produced.

What does that mean to me ?

confused
Now let’s take a look how much megapixels would you be actually using (regardless of how many you got in your digital camera). As stated above, I’m assuming that you will only view your photographs on your computer or mobile and have no intensions to print them as large as bill boards. Let’s see how many megapixles your computer screen got.
For calculating megapixels, there is a simple formula where you multiply your screen resolution. So, if you got a 1600 x 1200 resolution screen (which is greater than the standard ones found), it will have a megapixel count of 1600*1200 = 1,920,000 pixels (~2 Megapixels). And If I consider an above average monitor with a resoultion of 2048×1536, you have 3,145,728 pixels (~3 Megapixels). By the way, did you notice that in both cases, the megapixel count is still less than four which I told you would be more than enough? So, this proves that for viewing photographs on your big ass monitor in full size, you don’t even need a megapixel count of more than three !!

What about the photo prints ?

Now, coming to the other point, the main domain that is affected by the megapixel count is photo printing. The quality of photo prints is largely determined by the megapixel count on which the photograph is taken. That been said, it’s the only thing that is affected by megapixels directly. Assuming that you will print your family and holiday photographs in a fairly standard size (which you can fit in a frame at your desk), you still don’t need a camera with more than 4 megapixels in it! The following table should make it clear:
Minimum MegapixelsMaximum Print SizeResolution
2 megapixels4 x 6”1600 x 1200
3 megapixels5 x 7”2048 x 1536
5 megapixels8 x 10”2560 x 1920
6 megapixels11 x 14”2816 x 2112
8+ megapixels16 x 20”3264 x 2468
Normally, printing is done at 240 or 300 DPI (Dots Per Inch) which determines the best quality possible according to the print size to megapixel ratio. If we apply some mathematics, for a 8 x 10” photograph to be printed at 240DP, we need
8*240*10*240 = 4,608,000 pixels (or 4 megapixels), which is still less than the count mentioned in the above table.

The Mobile Camera

mobile
Mobile and cell phone companies keep luring their customers by adding megapixels to their already crappy mobile phone cameras. I’ll again say it loud and clear, getting more megapixels wont get you better photographs from a mobile. Keep on adding megapixels and you’ll keep getting crappy photographs because all that matter is how powerful is the sensor behind that actually captures light. When Steve Jobs introduced iPhone 4 in the World Wide Developer Conference of Apple, he put this point forward loud and clear that megapixels doesn’t mean anything. It’s the engineering behind the camera, it’s the sensor, it’s the ability of the device to capture light photons. And it’s indeed evident, how the 5 megapixel camera of iPhone 4 takes far better photographs than even the 8-12 megapixel cameras of other mobile companies.

Conclusion

final
You don’t need a camera more having more than 4 or 5 megapixels for the things that you would be doing with it. Definitely, megapixel count is not the only important thing that defines the image quality which is also evident that many high end cameras with lesser megapixel counts and a more powerful CCD sensor take far better photographs from their low end, higher megapixel counterparts. I’m not saying that having higher and megapixel is bad. But only having that, indeed is. So, next time someone boasts about higher megapixels and still fails to take better photographs, direct him to shutterskills


Read more: http://shutterskills.com/how-important-are-megapixels-in-your-digital-camera.html#ixzz1DxiQRroh

Twitter Delicious Facebook Digg Stumbleupon Favorites More

 
Design by Free WordPress Themes | Bloggerized by Lasantha - Premium Blogger Themes | Powerade Coupons